

Automate Exportlab workflows with Zapier
Running a photography or video production business means spending a lot of time on communication that should be automatic. Telling the client the gallery is ready. Notifying the editor that feedback came in. Creating the invoice after the contract is signed. These tasks are important, but they do not require a human to do them manually every time.
The Exportlab Zapier integration lets you connect your Exportlab workflow to the other tools your business runs on. When something happens in Exportlab — a gallery is published, a contract is signed, a video finishes processing — Zapier handles the next steps automatically.
Whether you are a solo photographer, a small studio, or a larger production team, automating these transitions means fewer things fall through the cracks and more time spent on actual creative work.
What is Zapier?
Zapier is an automation platform that connects apps and lets you build automated workflows called Zaps. Each Zap has a trigger — something that happens in one app — and one or more actions that run automatically in response across your other apps.
Zapier connects thousands of apps, which means you can link Exportlab to your email platform, CRM, project management tool, spreadsheet, Slack, and more — without writing code or managing infrastructure.
Zapier is designed to be accessible. If you can describe a workflow in plain language, you can build it in Zapier.
Why connect Exportlab with Zapier?
Creative work generates handoffs. A contract is signed and someone needs to act on it. A gallery is delivered and the client should be notified. A video comes back from processing and the editor needs to know it is ready for review.
Without automation, these handoffs rely on people remembering to check and follow up. That works fine when you have one or two projects. It starts to break down at scale.
The Exportlab Zapier integration connects your production events directly to your other tools. That means:
- Clients hear from you the moment their gallery is published
- Your team knows when feedback arrives on a video, without you having to relay it
- Contracts that get signed automatically move projects forward in your tracker
- New clients are added to your CRM without manual data entry
- Project phase changes are reflected in your production board in real time
These automations run in the background. You set them up once and they work every time, for every client.
How to set up the Exportlab Zapier integration
Step 1 - Generate an API key in Exportlab
In Exportlab, go to Settings -> Integrations -> API Keys and generate a new API key. The key starts with sk_ and is only shown once — save it before closing the dialog.
You will also need your workspace slug. If your Exportlab workspace is at mystudio.exportlab.io, your workspace slug is mystudio.
Step 2 - Open Zapier and create a new Zap
Go to zapier.com and click Create Zap. When prompted to choose a trigger app, search for "Exportlab".
Step 3 - Select an Exportlab trigger
Choose one of the available Exportlab trigger events. For example: "Watch Contract Signed" or "Watch Gallery Published".
Step 4 - Connect your Exportlab account
Zapier will ask you to connect your Exportlab account. Enter:
- API Key — the
sk_...key from step 1 - Workspace Slug — for example,
mystudio
Zapier verifies the connection immediately. Once connected, you can reuse this connection across all your Exportlab Zaps.
Step 5 - Test the trigger and add your action
Zapier will ask you to test the trigger. If there are recent events in your Exportlab workspace, it will pull sample data so you can see what the trigger returns.
After testing, add the action — for example, send an email, create a task, update a CRM record, or post a Slack message. Map the Exportlab event fields to your action fields, then activate the Zap.
How the integration works
The Exportlab Zapier integration is polling-based. This means Zapier regularly contacts Exportlab and checks whether anything new has happened since the last poll.
If a new event is available — for example, a gallery was just published or a client submitted video feedback — Zapier receives the data and runs the Zap.
Think of it like a postal service that checks your Exportlab mailbox on a schedule. If there is a new message, it picks it up and delivers it to your other tools. You do not need to watch for it yourself.
The polling interval depends on your Zapier plan. Shorter intervals mean faster reactions. For most creative workflows, even a five or ten minute delay is acceptable — the important thing is that it happens reliably and without manual intervention.
You do not need to configure anything in Exportlab beyond the API key. There are no webhooks to set up. Zapier handles the polling automatically.
Available Exportlab triggers for Zapier
Watch Gallery Published
This trigger fires when a gallery is published or unpublished in Exportlab. The event includes the gallery token, the public gallery URL, and the current published state.
Example workflows:
- Gallery published -> send the client a gallery delivery email
- Gallery published -> post a notification in your team's Slack channel
- Gallery published -> create a delivery log entry in Airtable
- Gallery unpublished -> notify your team that client access has been paused
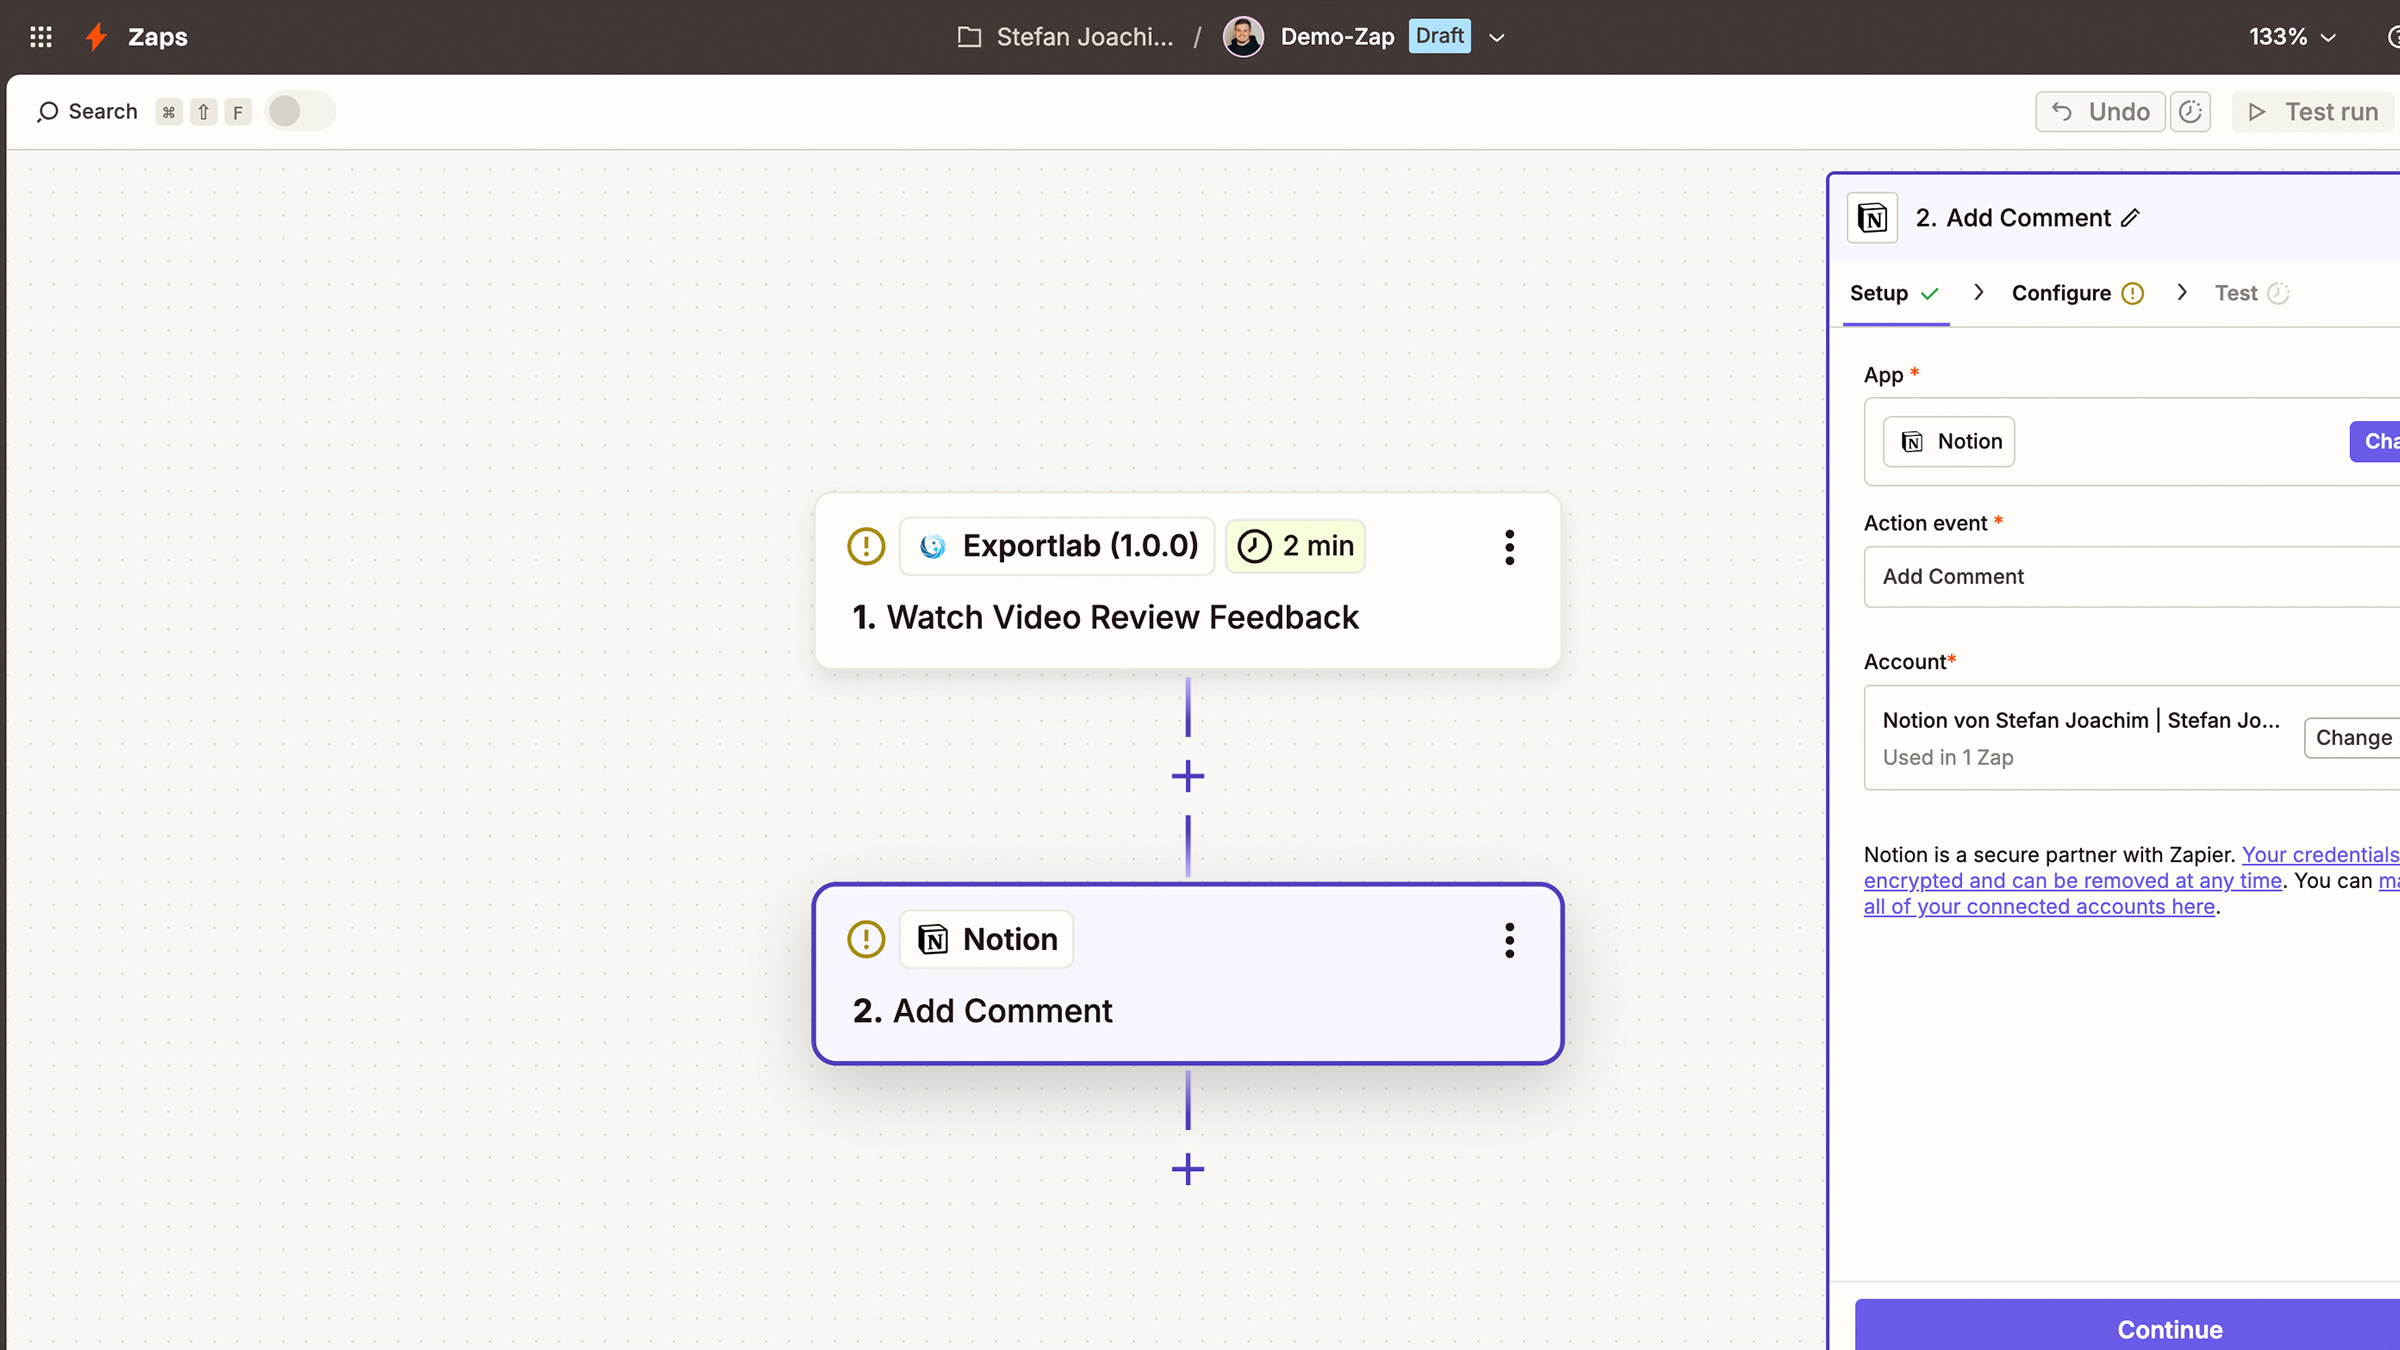
Watch Video Review Feedback
This trigger fires when a client submits feedback on a video through Exportlab's video review tool. The event includes the reviewer's name, review status, optional top-level note, and individual comments with text and timestamps.
Example workflows:
- Feedback received -> create a revision task in Asana or ClickUp with the comment list
- Feedback received -> post a Slack message to the editor with all comments
- Feedback received -> send an internal email summary to the project lead
- Feedback closed -> notify the client that the revisions are being addressed
Watch Video Processing Complete
This trigger fires when a video has finished processing in Exportlab after upload and transcoding are complete. The event includes the video ID, video desk URL, and available renditions.
Example workflows:
- Processing complete -> send the review link to the editor
- Processing complete -> notify the client that the video is ready for review
- Processing complete -> create a quality control checklist task
- Processing complete -> update a project status field in Notion or Monday.com
Watch Contract Signed
This trigger fires when a client signs a contract in Exportlab. The event includes the contract ID, associated project ID, client name, and contract title.
Example workflows:
- Contract signed -> create a draft invoice in QuickBooks or FreshBooks
- Contract signed -> update the deal stage in your CRM
- Contract signed -> send the client a confirmation email
- Contract signed -> post a "project confirmed" message to your team's Slack
Watch Contract Fully Executed
This trigger fires when all parties have signed a contract. This is distinct from "Contract Signed" because it fires only when the contract is fully binding.
Example workflows:
- Fully executed -> trigger a client onboarding email sequence
- Fully executed -> move the project to active status in your project tracker
- Fully executed -> notify your production team that the project can officially start
Watch Client Created
This trigger fires when a new client record is created in Exportlab. The event includes the client ID, email address, company name, and status.
Example workflows:
- Client created -> add the contact to your CRM
- Client created -> start a welcome email sequence
- Client created -> create a shared Google Drive folder for the client
- Client created -> add a row to a client tracking spreadsheet
Watch Project Phase Transition
This trigger fires when a project moves from one workflow phase to another in Exportlab. The event includes the project ID and the target phase.
Example workflows:
- Phase changed to editing -> notify the editor
- Phase changed to delivery -> remind the client team to prepare for gallery review
- Phase changed -> update the column in your Trello or Asana board
- Phase changed -> log the transition timestamp in a project reporting sheet
Practical workflow examples
Contract to project kickoff
A client signs a contract in Exportlab -> Zapier creates a draft invoice in your invoicing tool, adds a "New Project" card to your Trello board, and posts to Slack.
Gallery delivery
A gallery is published -> Zapier sends a personalized delivery email to the client via Gmail or Mailchimp, logs the delivery date and gallery URL in a Google Sheet, and creates a follow-up reminder task for two weeks later.
Video review feedback
A client submits video feedback -> Zapier creates a task in ClickUp or Asana with the reviewer name, all comments, and a link to the video desk. It also posts a summary to the project's Slack channel so the editor sees it immediately.
Client onboarding
A new client is added in Exportlab -> Zapier adds the contact to HubSpot with company and email pre-filled, creates a Google Drive folder named after the client, and triggers the first email in an onboarding sequence.
When should you use Zapier versus Make?
Both Zapier and Make connect Exportlab to your other tools, and both support the same set of triggers. The right choice depends on how you prefer to work.
Use Zapier if:
- You want to get started quickly with a simple, guided setup
- You already use Zapier for other tools and want to keep everything in one place
- Your workflow is a straightforward trigger-to-action connection
- You prefer a clean, step-by-step interface
Use Make if:
- You want a visual canvas showing the full flow of your scenario
- Your workflow has multiple branches or conditions
- You want to transform or format data between steps
- You need more control over error handling or multi-step logic
Neither platform is superior — they suit different working styles. If you are just getting started with automation, Zapier is generally faster to learn. If you want deeper control over complex workflows, Make gives you more flexibility.
Current availability
The Exportlab Zapier integration is currently in the process of becoming publicly available. If you would like early access, contact Exportlab support to ask about the Zapier integration.
Get started
The Exportlab Zapier integration is built around the events that matter in real photo and video production workflows, not generic triggers. Each event maps directly to something that happens in a project, so your automations are meaningful and relevant.
Want to automate a workflow that is not listed here? Tell us what you want to connect. Exportlab integrations are built around real photo and video production workflows, and we are always interested in learning which tools creative teams rely on.