

The After Effects bounce expression: copy it, then understand it
Keyframing a bounce by hand is a losing game. You set four keyframes, drag the curves, play it back, and it looks wrong in a way you cannot name. Twenty minutes later it is still wrong.
An expression does it in one paste. Here is the one I actually use — not the version that circulates everywhere, but one with two changes that matter in production.
The expression
Paste this onto any animated property (position, scale, rotation) that already has at least two keyframes:
amp = .04;
freq = 1.8;
decay = 3;
n = 0;
time_max = 3;

if (numKeys > 0) {
    n = nearestKey(time).index;
    if (key(n).time > time) {
        n--;
    }
}

if (n == 0) {
    t = 0;
} else {
    t = time - key(n).time;
}

if (n > 0 && t < time_max) {
    v = velocityAtTime(key(n).time - thisComp.frameDuration / 10);

    // Ease Out Factor (starts at 1, gradually reduces to 0)
    easeFactor = easeOut(t, 0, time_max, 1, 0);

    value + v * amp * Math.sin(freq * t * 2 * Math.PI) / Math.exp(decay * t) * easeFactor;
} else {
    value;
}
To apply it: alt-click (option-click on Mac) the stopwatch next to the property, paste, click anywhere outside the field.
What each parameter does
The four numbers at the top are the only things you need to touch. Everything below them is plumbing.
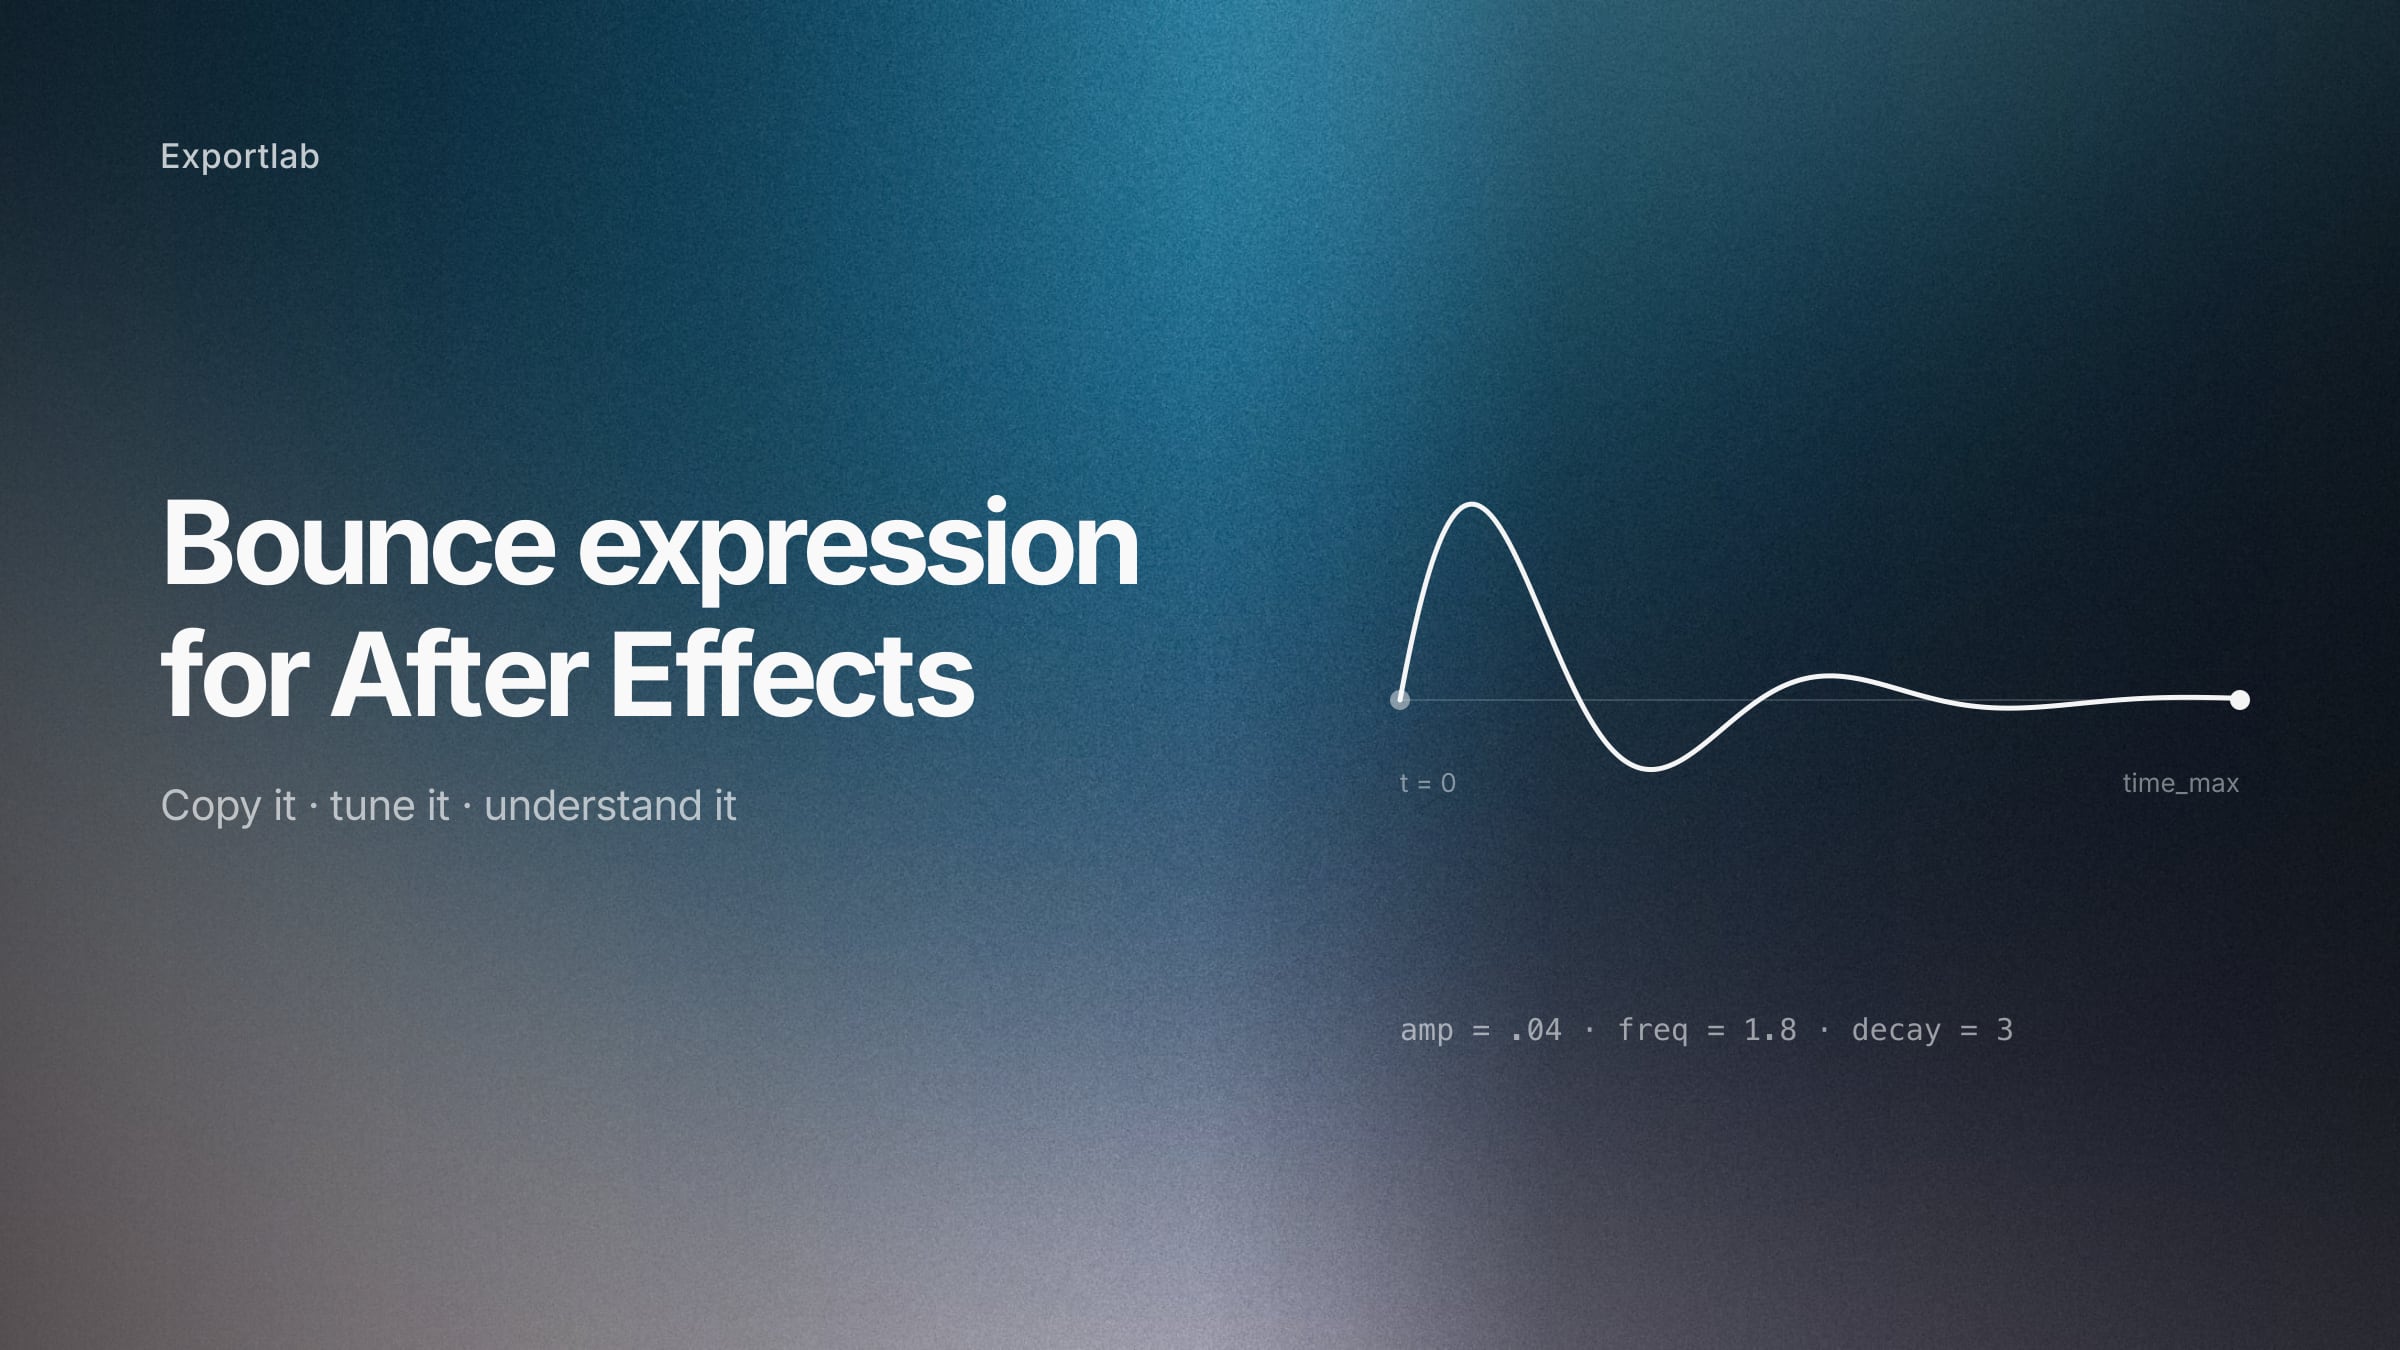
amp — amplitude (0.04). How far the overshoot travels past the target. Raise it for a bigger, looser bounce; lower it for a subtle settle. This is the value you will adjust most often, and small changes matter — 0.08 is already twice as dramatic.
freq — frequency (1.8). How many oscillations per second. Higher means a faster, tighter wobble; lower means slow, heavy swings. Think of it as the weight of the object: a beach ball has low frequency, a metal spring has high.
decay — how fast it dies (3). Larger values kill the bounce sooner. At decay = 1 it keeps wobbling for a long time; at decay = 6 it barely bounces once. This is the parameter that separates "playful" from "annoying".
time_max — the hard cutoff (3). After this many seconds, the expression stops calculating and returns the plain value.
The two parts most versions leave out
Search for a bounce expression and you will find roughly the same fifteen lines everywhere. Two things in the version above are usually missing, and both solve real problems.
The time_max cutoff. Without it, the expression keeps evaluating for the entire length of the layer. The maths has long since decayed to nothing visible, but After Effects still calculates it on every frame, for every property that has the expression. On a composition with dozens of animated elements you feel it in the preview.
The easeFactor. A pure decaying sine does not reach zero — it approaches it. In practice the motion stops when the movement becomes smaller than a pixel, which is an arbitrary moment and can leave a faint twitch at the end. Multiplying by an ease that runs from 1 to 0 across time_max forces a clean stop. The difference is subtle on a big bounce and very obvious on a small one.
How it works, briefly
Three lines carry the whole thing.
velocityAtTime(...) samples how fast the property was moving just before the keyframe. That is why the expression needs keyframes at all: it does not invent motion, it reacts to yours. The frameDuration / 10 offset samples slightly *before* the keyframe, because at the keyframe itself the velocity has already dropped to zero.
Math.sin(freq * t * 2 * Math.PI) produces the oscillation — the back-and-forth.
Math.exp(decay * t) grows quickly over time, and dividing by it shrinks the oscillation. That is the damping.
Multiply those together, add the result to value, and you have a bounce that starts at the speed your animation was already moving and settles from there.
Where to use it (and where not)
Position is the obvious case: a card sliding in, a lower third landing, an icon dropping into place.
Scale works well for anything appearing — but reduce amp to about 0.02. Scale is more sensitive than position, and the same amplitude that looks good on a moving card looks rubbery on a growing logo.
Rotation is where it gets fun: a badge swinging into place, a notification icon ringing. This is a case for higher freq.
Where it does not belong: anything that has to hit an exact value at an exact frame. Masks, track mattes, precise UI states. The expression overshoots by design, which is the whole point — and a problem when the endpoint is not negotiable.
Common problems
Nothing happens. The property has fewer than two keyframes. The expression reacts to motion; with no motion, there is nothing to bounce.
The bounce goes the wrong way. It follows the direction of travel into the last keyframe, so this is usually a sign the keyframes themselves are wrong, not the expression.
It bounces too much. Raise decay before lowering amp. Decay controls how long, amp controls how far, and "too much" is usually a length problem.
It bounces on the first keyframe too. That is what the n == 0 check prevents — if you edited that line out, put it back.
Preview crawls. Check time_max is still there, and disable motion blur while adjusting. Turn it back on before rendering: a bounce without motion blur looks noticeably cheap, and it is the easiest thing in the world to forget.
Expression vs plugin vs manual keyframes
Manual keyframes give total control and cost a great deal of time. Worth it for hero moments where the exact timing carries the shot; not worth it for the fortieth UI element.
Plugins like Bouncer or Flow add a panel with sliders and are genuinely pleasant to use. They also mean anyone opening your project needs the same plugin installed — worth thinking about before handing files to a client or a collaborator.
The expression travels with the project, needs nothing installed, and is four numbers you can tune. That is why I ended up here after using a plugin for a while.
FAQ: bounce expressions in After Effects
How do I add an expression in After Effects?
Alt-click (option-click on Mac) the stopwatch icon next to a property in the timeline. A text field opens where the keyframe values were. Paste the expression, then click anywhere outside the field to apply it.
Why does my bounce expression do nothing?
The property needs at least two keyframes. The expression works by reading the velocity going into the last keyframe, so with no keyframes there is no motion to react to.
How do I make the bounce stronger or weaker?
Change amp. Higher values overshoot further. Also try moving your two keyframes closer together — that increases the incoming velocity and strengthens the bounce without touching the code.
How do I stop it bouncing for so long?
Raise decay. At 3 the bounce settles quickly; at 1 it wobbles for a long time. time_max sets a hard cutoff, but decay is the parameter that shapes how it fades.
Does the bounce expression work on scale and rotation?
Yes, on any animated numeric property. For scale, lower amp to around 0.02 — scale exaggerates the overshoot and the default value tends to look rubbery.
Do expressions slow down After Effects?
They are evaluated on every frame, so many of them across a large composition do add up. The time_max cutoff in this version helps by returning a plain value once the bounce is over, instead of calculating a decayed sine for the rest of the layer.
Expression or plugin — which is better?
The expression needs nothing installed and travels with the project file, which matters when someone else opens it. A plugin gives you sliders and a faster workflow. For a solo project either is fine; for anything you hand off, the expression is safer.
After the animation is done
Once the bounce sits right, the work moves on to the part nobody makes tutorials about: showing the client, collecting their notes, and getting an approval you can point at later. If that currently happens in email threads and "at 0:14 the logo feels off" messages, that is the problem Exportlab is built for — frame-accurate comments on the actual cut.