

Three-point lighting: how key, fill and back light actually work
Three-point lighting is the setup almost every interview, talking-head video and portrait is built on. Three lights, each with one job: one shapes the face, one controls how deep the shadows go, one separates the subject from the background.
The theory takes two minutes to read. What actually takes time is developing a feel for *why* moving the key light 20 degrees changes the whole mood of a shot. That is what the interactive diagram below is for — move the lights and watch what happens to the face.
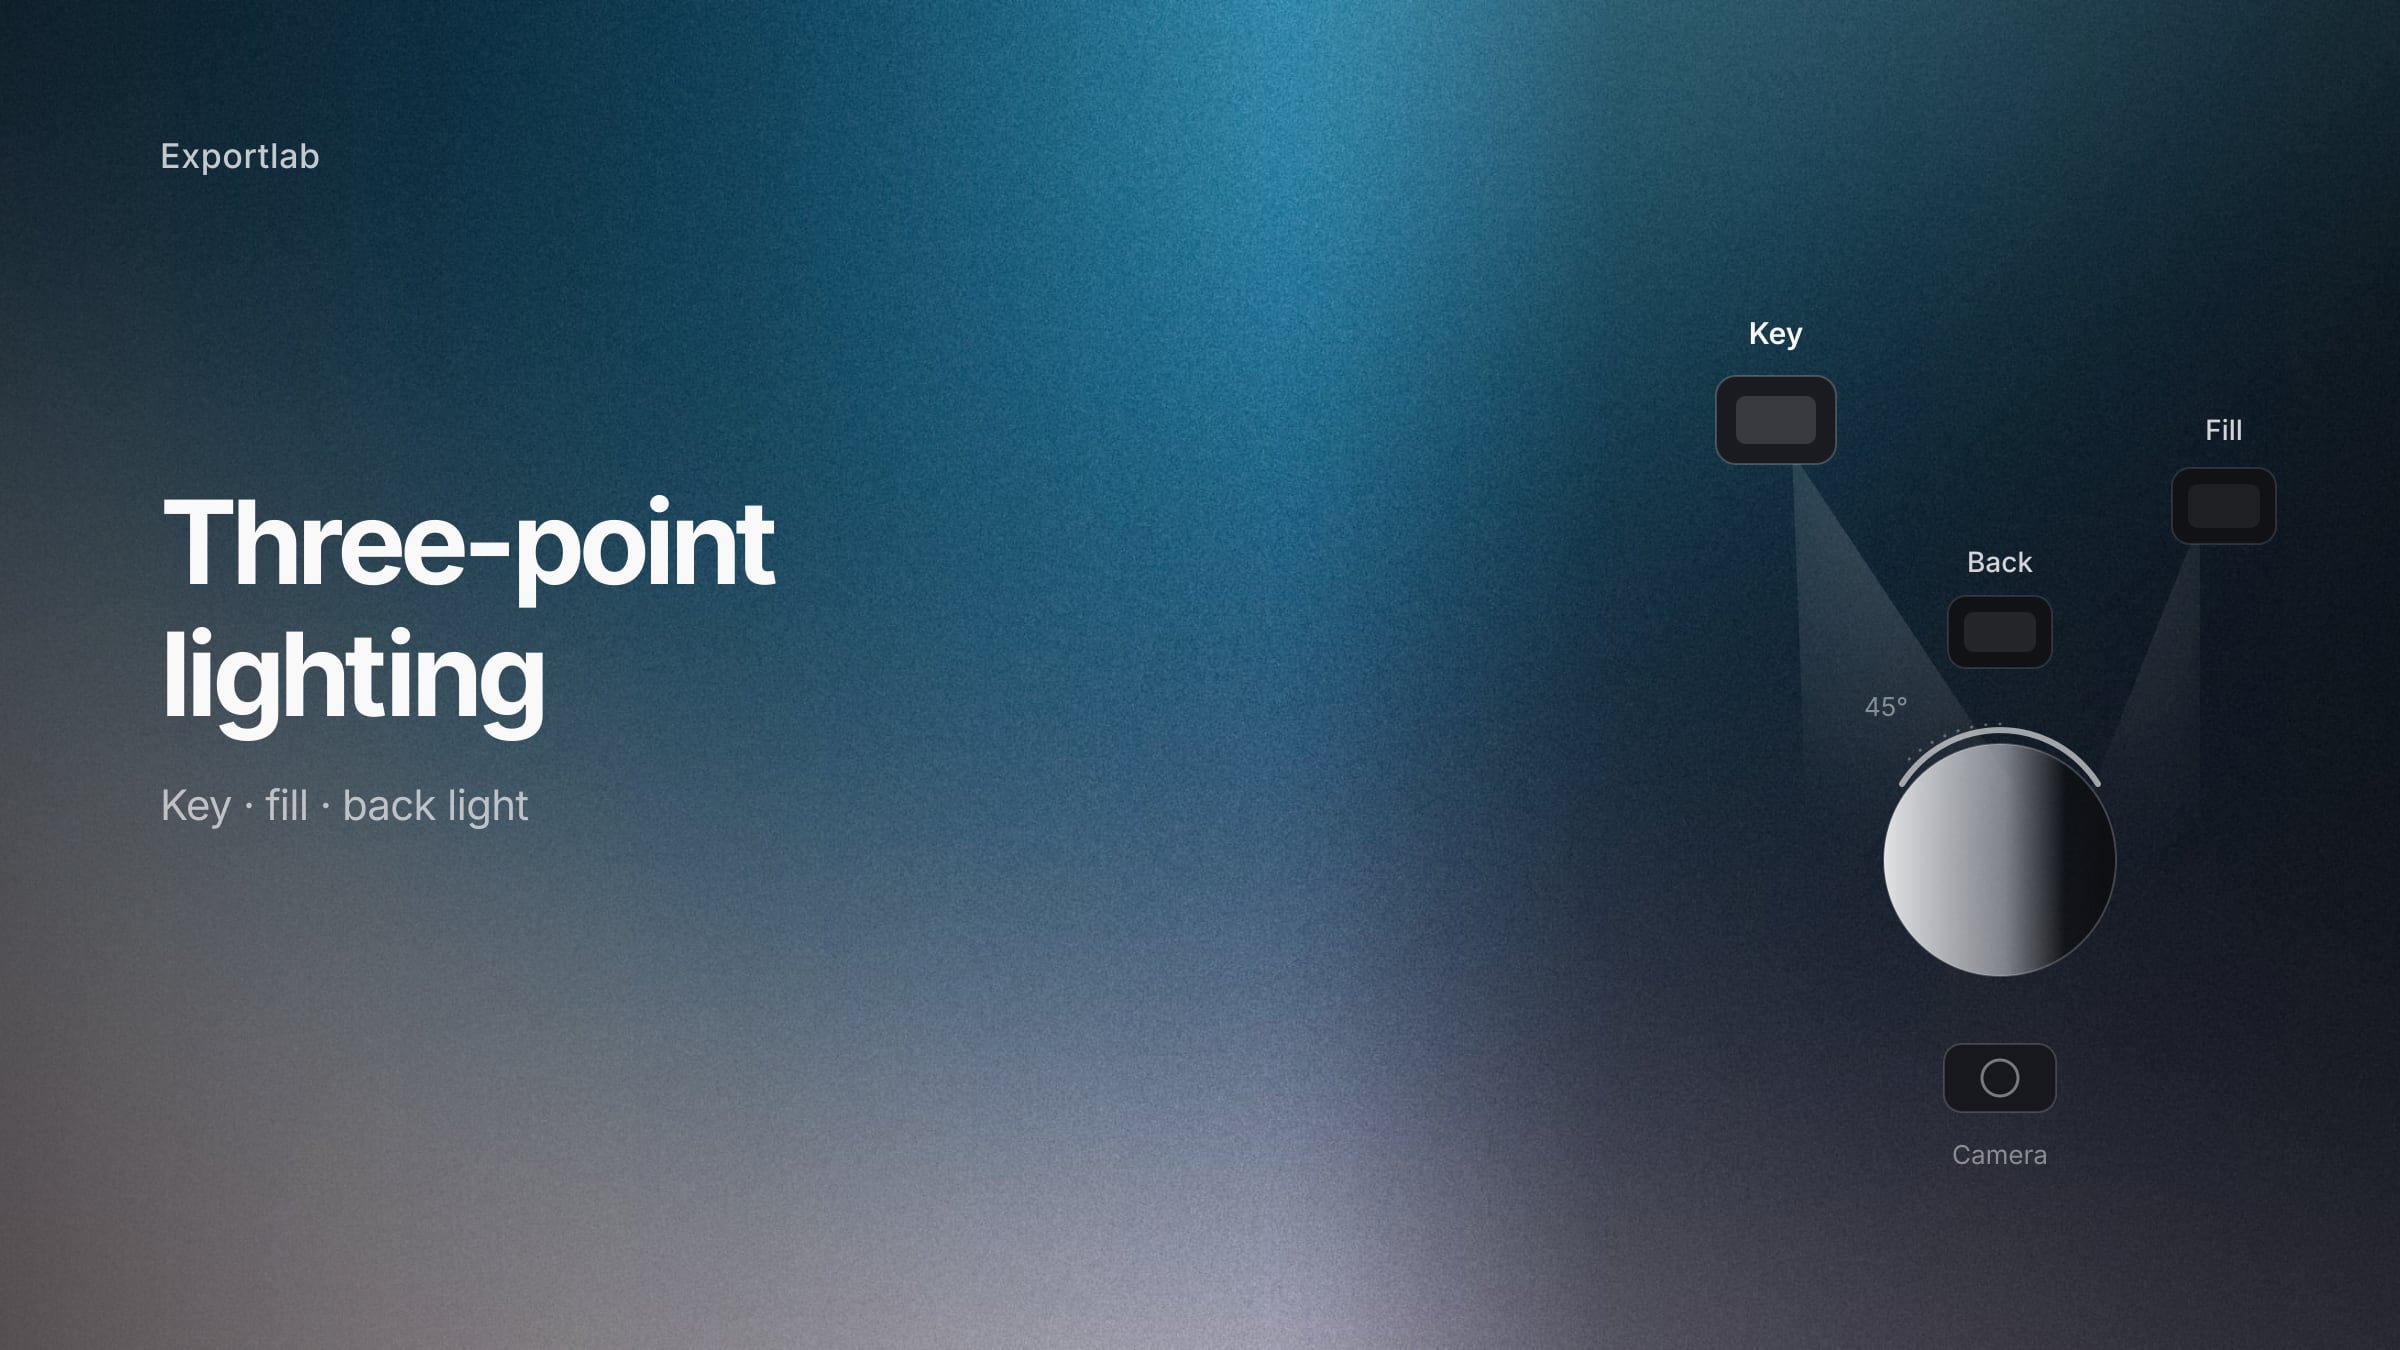
The three lights and what each one does
Key light — the one that does the shaping. This is your main source and the brightest of the three. Its position decides almost everything about the look: where the shadow of the nose falls, how much of the face sits in shadow, whether the result feels friendly or dramatic. If you only ever get one light right, make it this one.
Fill light — the one that controls contrast. The fill sits opposite the key and lifts the shadow side. It is not there to be seen; it is there to decide *how dark* the dark side gets. Turn it off and you get hard, moody contrast. Turn it up to match the key and the face goes flat and evenly lit. The ratio between key and fill is the single most useful dial in the whole setup.
Back light — the one that creates depth. Placed behind the subject, aimed at the head and shoulders, it draws a bright rim along the edge. Without it, a dark-haired person in front of a dark background melts into it. It is also called a hair light or rim light, and it is the light people forget first and miss most.
Try it: move the lights and watch the face
The plan on the left is the room seen from above. The face on the right shows roughly what your camera would see. Drag the key light around the subject and watch the shadow move — then take the fill down to zero and see the same angle turn dramatic.
Setup seen from above
What the camera sees
The four lighting patterns, and when to use them
The angle of the key light is not a matter of taste. Each range produces a recognisable pattern with a name, and each one says something different.
Flat lighting (key near the camera, 0–15°). The light sits almost on the lens axis, shadows nearly disappear. It is forgiving, it hides skin texture and wrinkles, and it looks a bit like a passport photo. Useful for beauty, product presenters and anyone who should look approachable rather than interesting.
Loop lighting (roughly 15–40°). A small shadow loops down from the nose towards the corner of the mouth without touching it. This is the safest portrait light there is: it gives the face shape without turning it into a drama. If you are unsure, start here.
Rembrandt lighting (roughly 40–65°). The shadow from the nose connects with the cheek shadow and leaves a small triangle of light under the eye on the shadow side. Named after the painter, and still the standard for anything that should feel considered and cinematic.
Split lighting (roughly 65–90°). The light comes from the side, half the face is lit, half falls into shadow. Strong, moody, and unforgiving. It suits documentary interviews about difficult subjects, crime formats, character portraits — and it is the wrong choice for a friendly company video.
The key-to-fill ratio: the number that decides the mood
Photographers talk about lighting ratios, and it sounds more technical than it is. The ratio just describes how much brighter the key side is than the shadow side.
| Ratio | Look | Typical use |
|---|---|---|
| 1:1 | Flat, no visible shadow side | Beauty, presenters, corporate |
| 2:1 | Gentle modelling, still friendly | Interviews, most talking heads |
| 4:1 | Clearly visible shadow side | Portraits, documentary, drama |
| 8:1 and above | Deep shadow, high contrast | Film noir, character portraits |
For most video work, 2:1 to 4:1 is where you want to live. Below that the face goes flat; above that people start to look interrogated.
You do not need a light meter to set this. Turn the fill off, look at the shadow side, then bring the fill up until the shadow is as deep as you want it and no further. Your eye is good enough for this.
Building the setup without buying three lights
The name says three lights. In practice, most of what you see online was shot with fewer.
One light and a reflector. This is the single most useful setup for a solo shooter. The lamp becomes your key, a white reflector or a piece of foam board on the opposite side becomes the fill. The reflector costs almost nothing and gives you full control over the ratio by moving it closer or further away.
A window as key. Daylight through a window is a large, soft source and better than most cheap LED panels. Put the subject at roughly 45° to the window, put a reflector on the other side, done. The catch is that clouds change your exposure mid-interview, so watch it.
Two lights and a practical. If you have two lamps, use one as key and one as back light — not as fill. The fill can come from a reflector, but nothing replaces the separation that a back light gives you. A desk lamp or a lamp in frame can double as your back light in a pinch.
Where soft comes from. Soft light is not a feature you buy; it comes from the size of the source relative to the subject. A small panel held close is softer than a big softbox placed far away. If your light looks harsh, the first thing to try is moving it closer, not buying something else.
Common mistakes that cost you the look
The key light is too far away. Small source at distance means hard shadows and rapid falloff. Bring it closer than feels natural.
The fill is as bright as the key. Then you have two key lights, the face flattens out and you get a second shadow going the other way. The fill must always be weaker.
The back light is in shot or blowing out. A back light that is too strong turns hair into a white halo. Aim it at the shoulders and hair, not the back of the head, and keep it flagged out of the lens.
Mixed colour temperatures. Daylight through the window at 5600K and a warm lamp at 3200K in the same frame gives you a face that is orange on one side and blue on the other. Match your sources, or gel one of them.
The background gets no light at all. Three-point lighting shapes the subject, not the room. A dark background behind a lit subject reads as cheap. One more light on the background — or just moving the subject further from it — fixes a lot.
Three-point lighting for photography vs video
The principles are identical; the constraints are not.
In photography you can work with flash, which gives you far more power than continuous light and freezes motion. You also see the result immediately and can adjust between frames.
In video everything has to be continuous, which means you need more sustained output, you have to think about flicker at higher frame rates, and you cannot fix a lighting mistake in the next frame — the whole take carries it. This is why video people obsess more about consistency and less about peak power.
The other difference is time. A portrait session lets you rebuild the lighting for every look. An interview gives you one setup that has to work for 40 minutes, so it needs to be forgiving: slightly more fill, slightly softer key, nothing that breaks if the subject leans back.
FAQ: three-point lighting
What is three-point lighting?
A standard lighting setup with three sources: a key light as the main source that shapes the face, a fill light opposite it that controls how deep the shadows go, and a back light behind the subject that separates them from the background. It is the foundation of most interview, portrait and talking-head lighting.
What are the three points in three-point lighting?
Key light, fill light and back light. The key does the shaping, the fill controls contrast, the back light creates separation. A fourth light on the background is common but is not part of the three.
Where should the key light go?
Roughly 45° to the side of the camera axis and slightly above eye level is the classic starting position — it produces Rembrandt lighting. Move it towards the camera for a softer, friendlier look, and further to the side for more drama.
Do I really need three lights?
No. One light plus a white reflector covers key and fill and gets you most of the way. If you can add a second light, make it the back light rather than the fill — separation is harder to fake than fill.
What is the difference between fill light and back light?
The fill sits on the opposite side of the key, facing the subject, and lifts the shadow side. The back light sits behind the subject, facing forward, and draws a bright edge along hair and shoulders. The fill controls contrast; the back light controls depth.
How bright should the fill light be?
Weaker than the key, always. For most interview work you want the shadow side about half to a quarter as bright as the lit side. Set it by eye: bring the fill up until the shadow is as deep as you want, then stop.
Does three-point lighting work with natural light?
Yes. A window makes an excellent key, a reflector opposite gives you fill, and a second reflector or a lamp behind the subject can stand in for the back light. The limitation is control — you cannot dim the sun, so you move the subject instead.
Where to go from here
Once the lighting is right, the rest of the job is what happens after the shoot: grading the footage, showing the client a cut, collecting feedback and delivering the final files. If you are looking for a way to hand video to clients that does not fall apart in email threads, that is what we build Exportlab for — but that is a problem for after you have got the light where you want it.